Filtering Explained
Like any sensor information, there will always be some inherent noise associated with the output data. This is practically unavoidable as anything that has free flowing electrons will have an associated thermal noise with it, among other sources. This is the main reason why you get grainy images with a digital camera at low light values (the signal to the noise ratio is low).
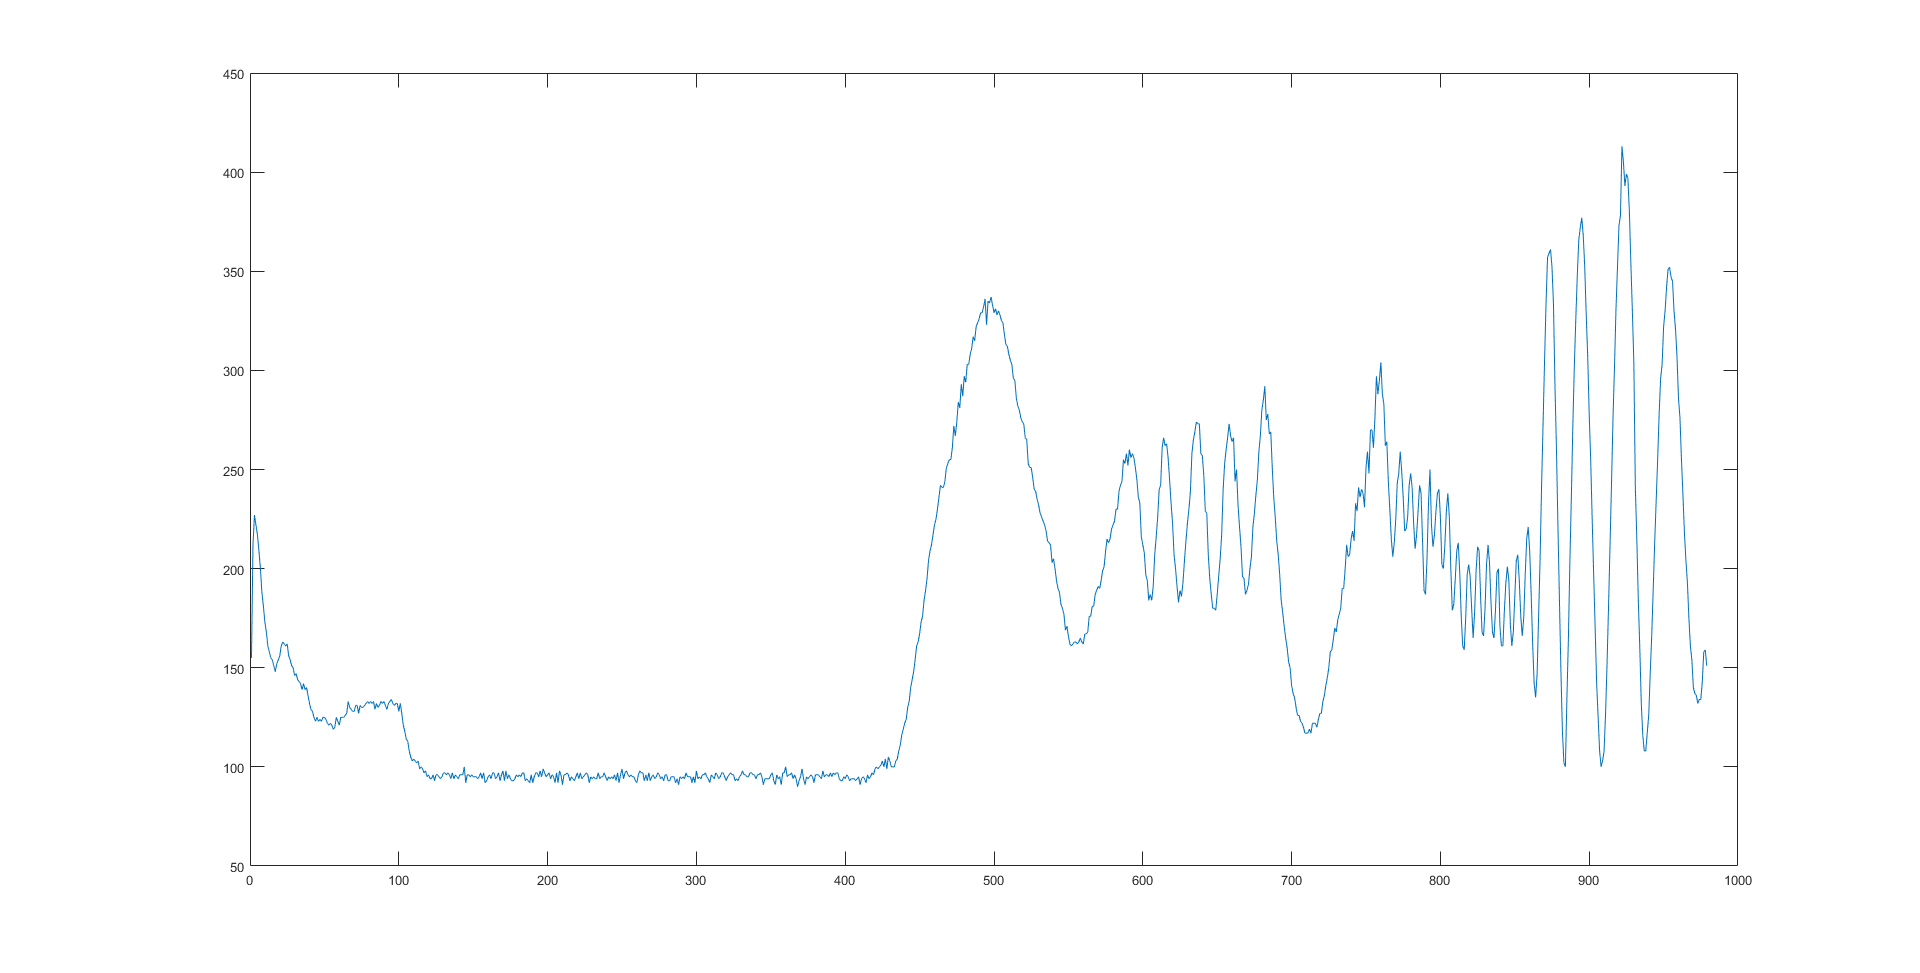
So how do we deal with noise? The first and easiest method is to just ignore it and move on. However, these higher frequency effects can play havoc with some control systems. If you look at the SensorDot's raw data output from some still, medium and fast motions, you will see many higher frequency small "spikes" on the data, which if used on robotics, can be translated into large acceleration values if you don't account for it on a smaller timescale (by filtering).
To help with this, each SensorDot helps to filter this noise out for you by default, which reduces the processing overheads required to filter data from numerous sensors at once. You can also turn this filtering off on the SensorDots if you prefer.
If you look at this example raw data from a MappyDot, you will notice the higher frequency spikes in the motion data:
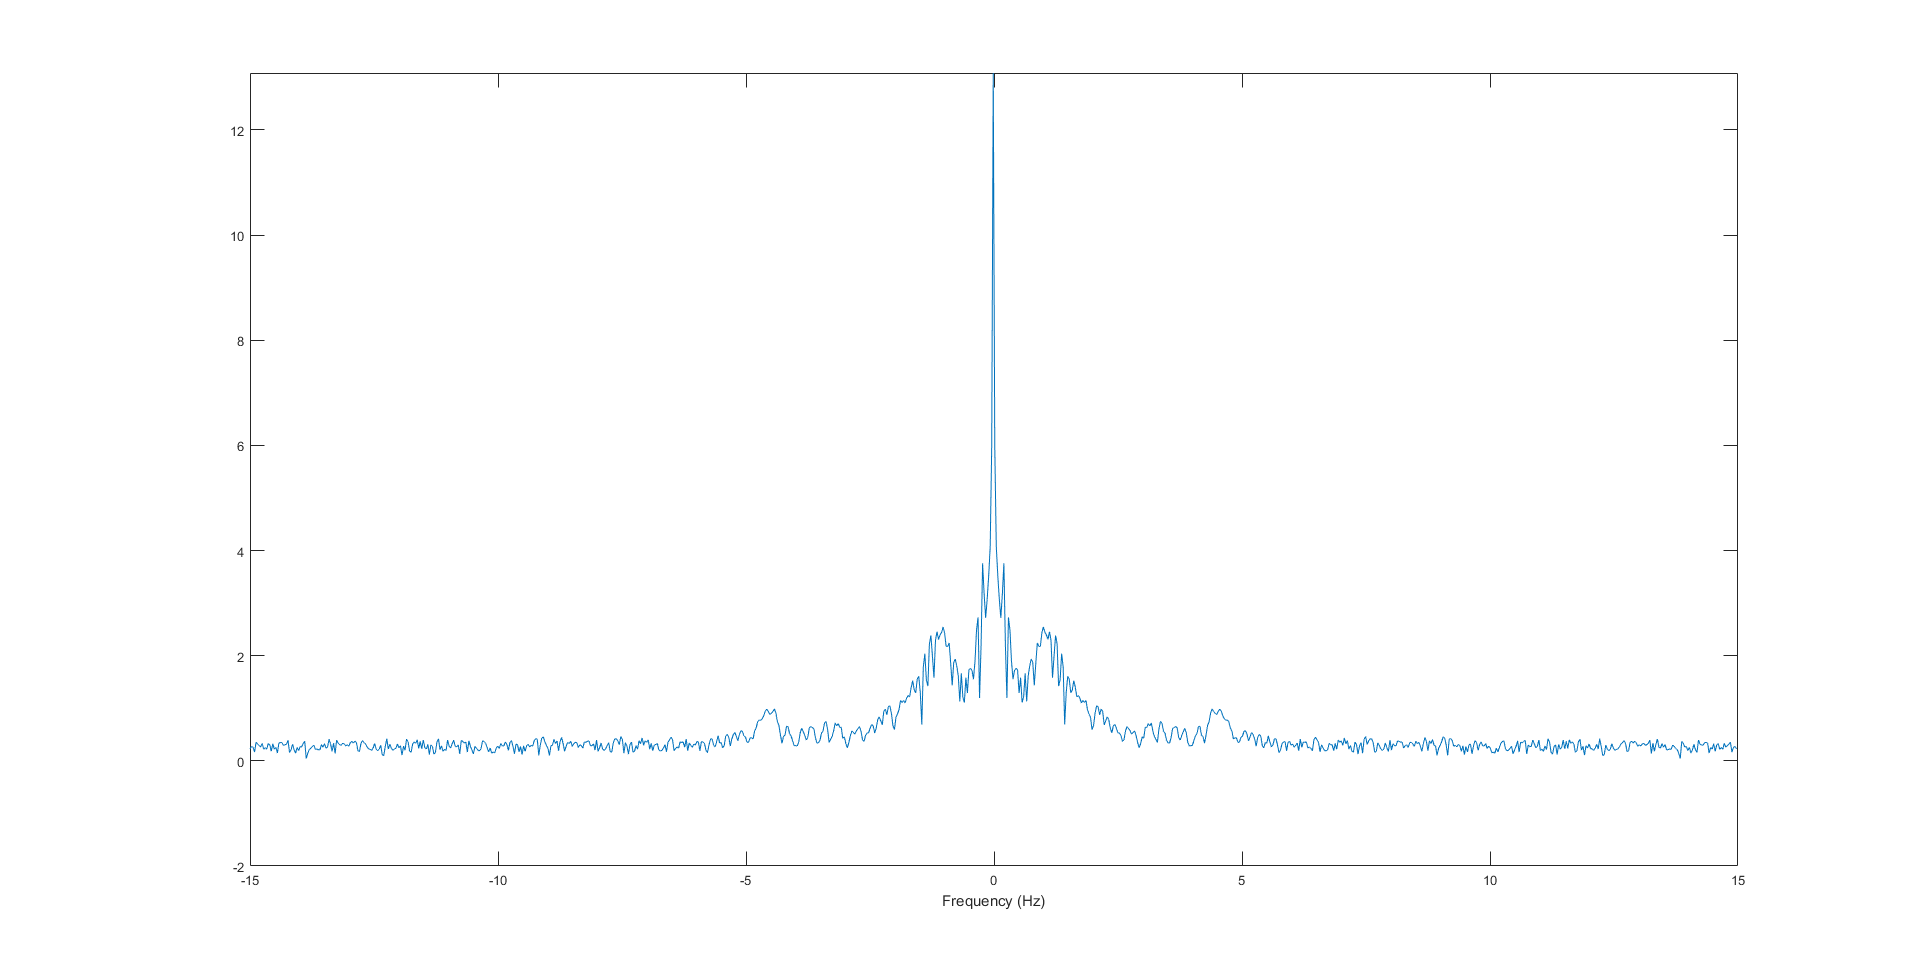
While these spikes look undesirable, if you look at the frequency domain of the dataset, you can see that after 5-6Hz, there is no significant changes apart from noise:
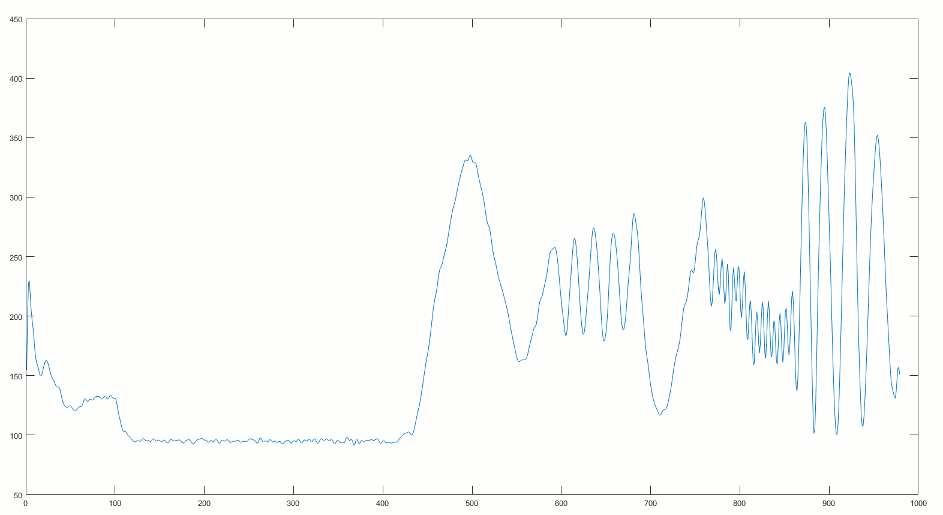
In this instance, the MappyDot can now use a medium order, low pass Butterworth filter to filter out these noise values. You can really see the difference it makes in this real algorithmic comparison animation:
Each SensorDot has a specialised filter, optimised to best fit the type of measurements that it is performing. These filters are also constantly being tweaked by us and the community, so be sure to grab the latest firmware to get the best features.